Installation Guide Raspberry Pi version 3 High Quality (HQ) Camera ASCOM driver
Introduction
This page explains the installation procedure of the ASCOM driver for the Raspberry Pi High Quality (HQ) camera released in April 2020.
Contact me via the e-mail address stated above when you encounter any issues or difficulties using this instruction so I can improve it or the driver software itself!
Special thanks to Iain Chris for ironing out the typos in this readme file 😃!
This driver will enable you to use the, in Q2 2020 released version 3 Raspberry Pi 12 Mpx camera with Sony IMX477 sensor for your favorite ASCOM enabled astronomy programs.
Step 1) Ordering and initial setup your Raspberry Pi
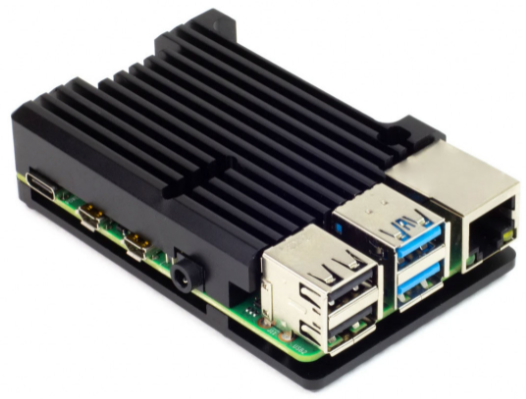
Raspberry Pi HQ camera
Order the Raspberry Pi version 3 camera (HQ Camera) from your favorite supplier. I have ordered it from Kiwi-electronics in the Netherlands via: https://www.kiwi-electronics.nl/en/hq-camera-voor-raspberry-pi-12-3mp-9988?search=hq.

Raspberry Pi versions
you don't have a suitable Raspberry Pi, order it as well. I recommend a Raspberry Pi 3 with 512 MB RAM (but 1GB will work as well) or a Raspberry Pi 4 with 2GB RAM (but the 4GB or 8GB versions will work as well), but older models will probably work as well but be much slower in retrieving the images.
SD card
Include in your order a micro-SSD card of at least 16GB with NOOBS (Raspberry Pi lite image) pre-installed. The Raspberry Pi lite image does not include the graphical user interface which is not needed for this project. When you want to install NOOBS on the SD card yourself find instructions here: https://projects.raspberrypi.org/en/projects/raspberry-pi-setting-up/2.
Raspberry casing
When needed order a nice Raspberry Pi casing ensure it has facilities to deal with the camera flatcable which needs to exit the casing in a proper way. I personally like this casing a lot: https://www.kiwi-electronics.nl/en/raspberry-pi-cases-68/aluminium-heatsink-case-for-raspberry-pi-4-black-4340 but it is certainly not the best casing for outside usage with damp conditions.
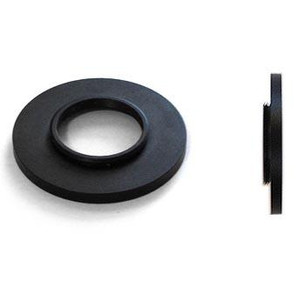
Attach the HQ camera to your telescope
You probably also need to order an adapter ring to mount the camera sensor to your telescope. Example: https://www.astromarket.org/andere-adapters/ts-optics-adapter-voor-t2-op-c-mount/p,47967 and maybe a T2 to 48mm adapter (if required for your telescope).
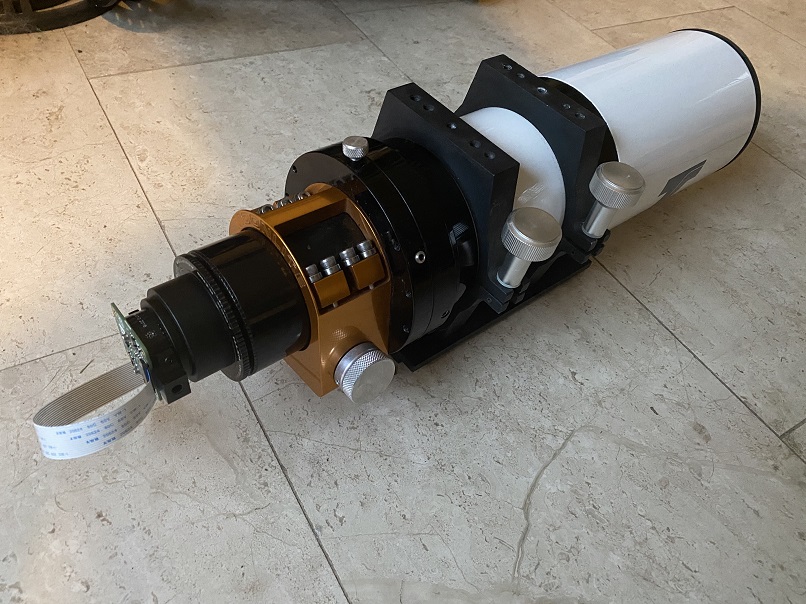
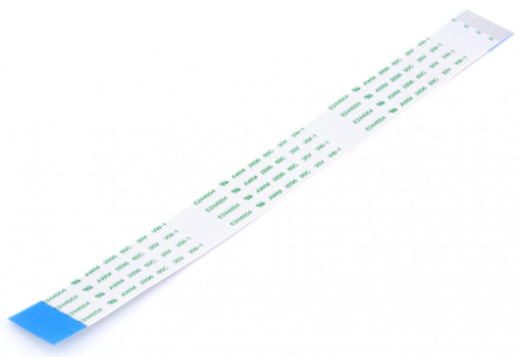
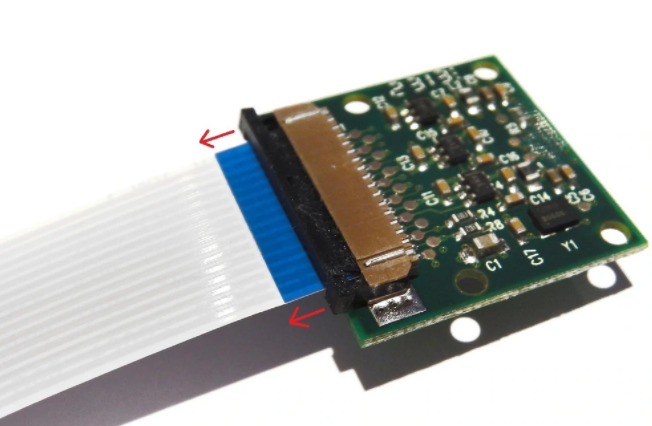
Camera flatcable
Also a longer e.g. 50 cm (20") camera flat cable will be handy because the standard with the camera sensor included flatcable is only 15 cm (6") long.
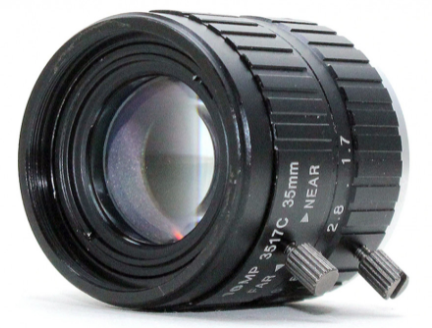
Test lense
Optionally order a test lense (for when the sensor is not used in combination with a telescope), e.g.: https://www.kiwi-electronics.nl/en/35mm-10mp-telephoto-lens-for-rpi-hq-camera-with-c-mount-10145. This is a nice lense but note that any cheap C type test lense will do the job, many cheaper ones are available on the internet.
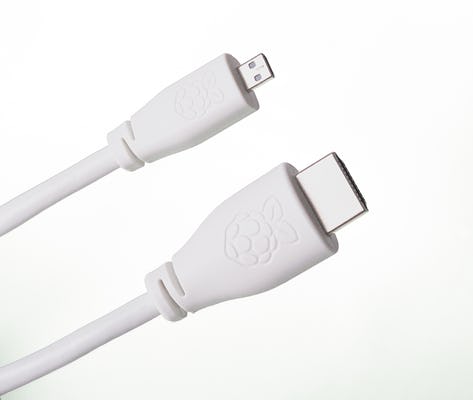
Other parts
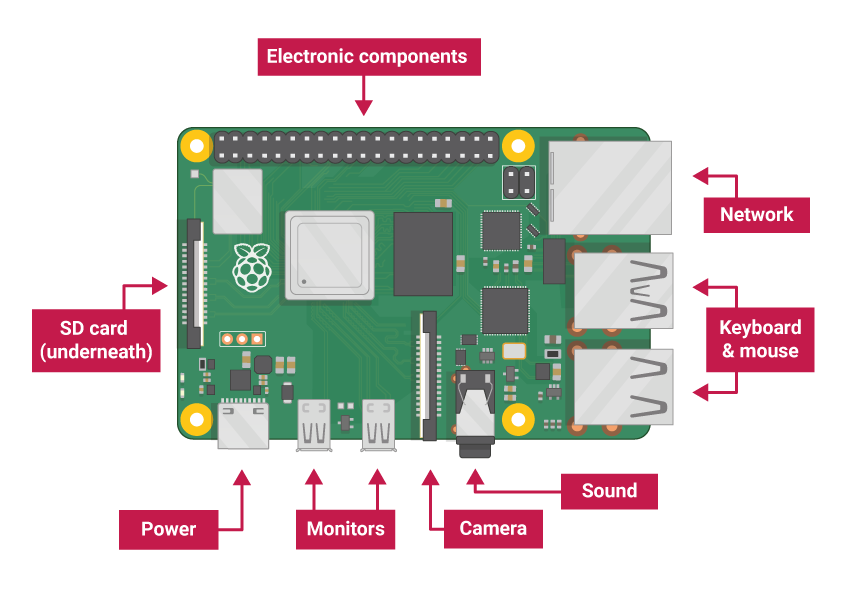
Make sure you have the needed cable(s) to hook up the Raspberry Pi to your monitor (micro HDMI or HDMI depending on the Raspberry Pi model, https://www.raspberrypi.org/products/micro-hdmi-to-standard-hdmi-a-cable/), a suitable power supply (2.5A for the Raspberry Pi 3 and 3A for the Raspberry Pi 4)for your country and an (extra) keyboard.
Step 2) Attach the HQ camera to the Raspberry Pi
Stop and un-power the Raspberry Pi
If your Raspberry Pi is already running shut it down properly. This is done with:
sudo shutdown -h 0
Wait app. 10 seconds for the Pi to stop all its processes and uncouple the power supply if you are detaching or attaching the camera cable, it is sensitive for static electricity and you might damage it when performing these action while it is still powered on.
Attach the camera to the Raspberry Pi
Insert the camera flat cable in the Raspberry Pi (the marked blue side of the cable facing towards the USB connectors) and the camera (if not pre-fitted) with the blue side facing away from the sensor). See https://thepihut.com/blogs/raspberry-pi-tutorials/how-to-replace-the-raspberry-pi-camera-cable.
Hook up you Pi
Place the SD card in the Raspberry Pi and fit it in the Pi casing. Attach your monitor, keyboard, network cable and power adapter and spin up the Raspberry Pi.
Step 3) Update your Raspberry Pi, install nano and enable Secure Shell (SSH) access:
First start
The first time you want to access your Raspberry Pi a keyboard and monitor will be needed to enable the secure shell option and retrieve the configured IP address of the Pi. Once you have enabled the secure shell interface service you should be able to access the Pi via a secure shell client like Putty via a workstation (e.g. Windows PC or Mac).
Boot up the Raspberry Pi (the default username is pi and the default password is raspberry). If your are using a Raspberry Pi OS version with a Graphical User Interface (GUI) enter the needed logon data during the installation wizard and open a terminal session. When using the Raspberry Pi lite OS version with the command line interface (CLI) logon when prompted.
Raspberry Pi firmware update (optional)
First perform a firmware and base software update of the Raspberry Pi and the camera's firmware and reboot the setup:
sudo rpi-update
Answer both questions with Y, the updated Raspberry Pi software will be downloaded and installed. Reboot the RPi (this will take app. 60 seconds):
sudo shutdown -r 0
Update the installed Raspberry Pi software
Secondly update all packages to the current version to ensure your Raspberry Pi is fully up to date (these actions might take a while):
sudo apt update -y
sudo apt upgrade -y
Install the user friendly text editor nano
Install the nano user friendly text editor (if not standard available in your RPi build):
sudo apt install nano -y
Configure automatic overnight software updates (optional)
If you want you Raspberry Pi to be always up to date with the latest software you might want to consider to add the following entry in its schedular (named crontab). This step is optional.
0 0 * * * apt update -y && apt upgrade -y
Add this line at the end of schedular configuration file bij entering the following command:
sudo crontab -e
You might want to select the editor nano when asked (this is only asked the first time the crontab is edited).
Add the crontab line stated above at the end of the configuration file and save it by pressing [CTRL]O and close the editor by pressing [CTRL]X.
Your Raspberry Pi will now automatically be updated each night at 0:00.
Change user password, hostname, WiFi (optional), camera interface, memory split and activate setup secure shell
Start the Raspberry Pi config tool and configure the following settings:
sudo raspi-config
- Change the user password to your liking option 1 System Options->S3 Password! (mandatory)
- Change the hostname (when desired) with option 1 System Options->S4 Hostname (optional)).
- When desired change the Wi-Fi setting (when not already done during the initial setup) with option 1 System Options->S1 Wi-fi (optional).
- Switch on the camera use option 3 Interface Options->P1 Camera (mandatory)).
- When desired switch on remote access (via SSH terminal like Putty) with option 3 Interface Options->P2 SSH (optional).
- Ensure the camera memory is configured for at least 128MB with option 4 Performance Options->P2 GPU Memory (mandatory).
Close the config tool (select the Reboot->Yes option). The reboot should be finished in a minute.
Setup secure shell (optional)
If desired download and install secure shell terminal software (like Putty) on your workstation to access your Raspberry Pi. Configure as user pi@[IP address] and save the configuration before starting it up. The IP address of the Raspberry Pi can found by executing the following command on your Raspberry Pi:
hostname -I
Step 4) Setup fixed IP-address for your Raspberry Pi (optional but highly recommended)
Determine IP address to use
To ensure your Raspberry Pi always uses the same IP address set it up as follow. Choose an IP address from your home network range which should in one of the following private address ranges:
- 10.xxx.xxx.xxx, or
- 172.[16 – 31].xxx.xxx, or
- 192.168.xxx.xxx
Determine home IP address range
You can check your home address range by checking the IP address on a Windows workstation. On your Windows desktop press [Windows key]->R and type cmd[enter]. A terminal screen will open. Now type ipconfig /all[enter]. Find your Ethernet adapter Ethernet entry (for workstations connected via a network cable) or Wireless LAN adapter Wi-Fi (for workstations using a wireless lan) and note its IPv4 Address, Default Gateway and DNS Servers.
Select another IP address in the same range of your home network. E.g. if your found address of your workstation is:
192.168.1.45 choose a static IP address for your RPi by changing the last (most right) digit, e.g. 192.168.1.250 (the last digit of the address must be between 1 and 254).
NOTE: It is recommended to reserver a range of IP addresses in your DHCP settings on your ISP router (e.g. 240 - 254) for fixed IP address usage in your home network.
Configure the choosen IP address
Change the DCHP configuration file to setup the static IP address:
sudo nano /etc/dhcpcd.conf
Scroll down in the file and remove the # (comment) before interface eth0 and the other items with exception of the statis ip6_address line in this section. Change the uncommented lines to:
interface eth0
static ip_address=[choosen IP address in your home network]/24
static routers=[Default Gateway IP address]
static domain_name_servers=[DNS Servers] 9.9.9.9 8.8.8.8
Save the file by pressing {CTRL]O, close nano by pressing [CTRL]X and restart the DHCP service to start using the configured IP address:
sudo service dhcpcd restart
Reconfigure your secure shell client
Do not forget the next time you want to connect to the Pi with your secure shell client you need to use the newly configured IP address.
Step 5) Configure your camera and test initial working
Grant permission to use the camera to the pi user
Log onto the Raspberry Pi using your newly configure password (and open een terminal session when in graphical mode).
Allow the pi user to use the camera by executing the following command:
sudo usermod -a -G video pi
Test the camera for the first time
Test your Raspberry Pi camera with the command:
raspistill -v -o output.jpg
This should create your first (probably out of focus) picture in the file output.jpg
Transfer image file
Transfer this output.jpg file from the /home/pi directory with a sftp tool like Filezilla or WinSCP to see if the image meet your expectations (spoiler alert: it is probably a fuzzy image because your lense was not in focus). You can also choose to setup NFS file sharing and share the /var/www/html and /home/pi folder so you can access these directories directly from your workstation (e.g. in Explorer (Windows) or Finder (Mac)).
Step 6) Setting up needed software to control the Raspberry Pi camera
Installing Apache web server, php programming language and imagemagick imaging software
Install the following packages on your Raspberry Pi to use the ASCOM HQ camera driver:
Install these packages by executing the following commands:
sudo apt install apache2 php imagemagick -y
Setting up the Apache web server
Allow the Apache www-data user to use the camera by executing the following command:
sudo usermod -a -G video www-data
Create images directory
Create the needed images directory in /var/www/html and ensure the Apache web server can access it:
sudo mkdir /var/www/html/images
sudo chown www-data:www-data /var/www/html/images
sudo chmod 660 /var/www/html/images
Step 7) Install raspiraw (optional)
Install and setup raspiraw to make raw images in currently experimental exposure mode Raw by following the following procedure:
Change the configuration file
Edit /boot/config.txt by:
sudo nano /boot/config.txt
Add the following line at the end of this file and save the file:
dtparam=i2c_vc=on
Reboot the Raspberry Pi:
sudo shutdown -r 0
Downloading & compiling the raspiraw software
Clone the raspiraw repo (including long_exposure) and build:
sudo cd /var/www/html
sudo git clone https://github.com/Hermann-SW/raspiraw
sudo cd raspiraw
sudo ./buildme
sudo git checkout origin/long_exposure
(Ignore output of checkout process)
cd ..
sudo chown -R www-data:www-data /var/www/html/raspiraw
Installing the needed dcraw libraries
Install libraries needed for dcraw:
sudo apt-get install libjasper-dev libjpeg8-dev gettext liblcms2-dev i2c-tools -y
Clone the dcraw repo and build:
sudo cd /var/www/html
sudo git clone https://github.com/6by9/dcraw
sudo cd dcraw
sudo ./buildme
sudo cd ..
sudo chown -R www-data:www-data /var/www/html/dcraw
Setting up and testing the i2c interface software
Set up i2c:
sudo cd /var/www/html/raspiraw
sudo modprobe i2c-dev
sudo ./camera_i2c
You should see something like this, where there is a number or numbers in the table:
Set state of 133 to 1
0 1 2 3 4 5 6 7 8 9 a b c d e f
00: -- -- -- -- -- -- -- -- -- -- -- -- --
10: 10 -- -- -- -- -- -- -- -- -- -- -- -- -- -- --
20: -- -- -- -- -- -- -- -- -- -- -- -- -- -- -- --
30: -- -- -- -- -- -- -- -- -- -- -- -- -- -- -- --
40: -- -- -- -- -- -- -- -- -- -- -- -- -- -- -- --
50: -- -- -- -- -- -- -- -- -- -- -- -- -- -- -- --
60: -- -- -- -- 64 -- -- -- -- -- -- -- -- -- -- --
70: -- -- -- -- -- -- -- --
If you only see "--" in the table then it probably did not work and I have found that running raspivid first fixes this:
raspivid -t 5000
./camera_i2c
Test raspiraw:
Test the raspiraw software by executing the following command:
./raspiraw -t 5000
Step 8) Install the php script in /var/www/html included at the bottom of this installation page:
Granting the needed permissions
First change the ownership of the /var/www/html directory to the www-data owner and group so the php script can write to this directory (and sub-directories):
sudo cd /var/www
sudo chown -R www-data:www-data html
Copy & Pasting the needed php script
To use this camera driver install the php script included in this instruction page below on your Raspberry Pi in the directory folder /var/www/html as RPi_camera.php (NOTE: this is a case sensitive file name).
sudo cd /var/www/html
sudo nano RPi_camera.php
Copy and paste the script from below this page into the editor and save the file by pressing [CTRL]O and exit the editor by pressing CTRL]X. The script starts with <?php on this page below right till the end of this page where is stated ?>. Include the <?php and ?> lines.
(Alternatively) download and transfer the needed php script
This php script can also be downloaded and transfered (via SFTP) to your Raspberry Pi /var/www/html directory). The file has a temporary zip extension to enforce the browser to download it (instead of showing it in the browser), however it is not compressed. After transferring the file to your Raspberry Pi give it its original php file extension:
sudo cd /var/www/html
sudo mv RPi_camera.zip RPi_camera.php
Set script permissions
Change the ownership of the file so the web server can use the file:
sudo chown www-data:www-data RPi_camera.php
Change the priviledges of the file so the webserver can read it:
sudo chmod 660 RPi_camera.php
Test the php script
You can test the script by entering the following URL in your favorite browser to take a picture of 1 second (fill in the configured IP address of your Raspberry Pi):
http://[IP address]/RPi_camera.php?shutter=1000000&exposure=auto&type=jpg&analog_gain=1
It should return the image name of the image file created in /var/www/html. Check the image file via the following URL (fill in your IP address and the returned image file name and file extension in your favorite browser):
http://[IP address]/[filename.extension]
If all works out well this will probably produces a blurry image (your lense is probably not in focus).
Step 9) Setting up a RAM drive (optional)
To ease the usage of the SD card and extent its lifespan it is recommended to setup a RAM drive. This is a virtual harddisk which resides in memory only. Therefor the generated files are not written to the RAM drive. Downside is that when a power cycle of the Raspberry Pi is done the content is gone. In this case however this should not be an issue for the output images (and log files) since they should already be absorbed by the client astro app.
Creating the RAM drive
Create and mount the RAM drive by following these steps:
sudo mkdir /mnt/ramdisk
Change the ownership and permission so that the Apache user www-data can use the RAM drive.
sudo chown www-data:www-data /mnt/ramdisk
sudo chmod 775 /mnt/ramdisk
sudo nano fstab
Add the next line and save the file by pressing [CTRL]O and close nano by pressing [CTRL]X.
tmpfs /mnt/ramdisk tmpfs nodev,nosuid,size=512M 0 0
Mount the drive for the first time with the mount -a command:
sudo mount -a
After a reboot of the Pi the RAM drive should automatically be mounted during the boot process.
Create softllink to RAM drive
Remove the images directory and replace it for a softlink to the RAM drive:
sudo rm -rf /var/www/html/images
sudo ln -s /mnt/ramdisk /var/www/html/images
Show the additional RAM drive
df
Step 10) Start using the ASCOM driver:
Install the ASCOM client software
Install the ASCOM driver software which can be downloaded via https://www.musquetier.nl/downloads/RPiCameraV3_Setup.exe on your workstation running your ASCOM compliant astro software of choice. This software will only work on Windows workstations (PC, laptops or pads).
Configuring IP address
Startup your favorite client application (e.g. Sequence Generator Pro or NINA), select the HQ camrea in your camera configuration page and configure the ASCOM HQ camera driver. First enter the IP address of your Raspberry Pi.

Web server port
When you decided to use an alternative TCP/IP port for your webserver on your Raspberry Pi, change it to your likings (Apache default uses port 80 which is the drivers default value).
Binning
Start with the binning setting 1x1, often you can deviate from this setting using the astro software itself and overwrite this setting during your configured sequences.
Exposure
For night time imaging use exposure Auto for testing during daytime and Night for night time photography. The Raw option is still experimental and requires the setup of raspiraw (see step 7 above).
Analog Gain
Analog gain can be used for non-Auto exposure modes. This will need some trial and error to determine the correct value for your setup.
White Balance
Switch the white balance off for night photography and use Auto (or another desired mode) for daytime testing.
Image format
Use jpg (fastest due to the hardware compression performed by the camera although it produces images without quality loss since the driver is configured with a quality setting of 100%), bmp (uncompressed, slow due to it filesize) or png (compressed, slow due to software compression).
Application
Make sure you select the correct application option in the ASCOM driver setup dialogue to match your application of choice.
Output Directory
Change this option when you want to place the output files in another place than /var/www/html (e.g. when you have setup in the RAM drive in step 9 change this to /mnt/ramdisk/). The entered path should end with a trailing forward slash /.
Convert to fits
Tick this option if you want the produced files to be automatically converted into fits files.
Tracing
Tick this option if you want tracing information to be logged by the ASCOM client driver
Debug Console
Tick this option if you want to have the client debug console switched on to follow the steps performed by the ASCOM client software.
Step 11) Play and learn
Experiment with the available settings. Background information on the workings of these settings can be read at the following page: https://www.raspberrypi.org/documentation/raspbian/applications/camera.md.
When not using the Raw exposure mode the script is using the raspistill command to capture images and the php script makes the most useful parameters available via the RESTful API of the php script.
The driver was primarily tested with Sequence Generator Pro and NINA but should/might work with other ASCOM compatible capturing programs as well. Please contact me via the stated email address above when you encounter issues using the driver iin combination with other software.
NOTE: Please start testing with image format type: "jpg" and exposure option: "auto" before experimenting with other image format types and exposure options...
Available parameters:
| Parameter | Default Value | Options |
| type | jpg | jpg, bmp, png |
| analog_gain | 1 | 1 - 16 |
| exposure | off | all options mentioned on the referred camera webpage are available |
| flicker | off | off, auto, 50hz, 60hz |
| awb | auto | off, auto, sun, cloud, shade, tungsten, fluorescent, incandescent, flash, horizon, greyworld |
| hflip | false | false, true |
| vflip | false | false, true |
| binning | 1 | 1, 2, 3, 4 |
| shutter | 1000000 | 1 - 239000000 (uSec.) |
| drc | off | off,low,medium,high |
| mode | 3 | 1, 2, 3, 4 |
| verbose | false | false, true |
Troubleshooting
Use the ASCOM client debug Window to see where the software might struggle to perform its tasks. Also on the Raspberry Pi in the /var/www/html directory for each image file created a log file is held for 15 minutes containing the raspistill/raspiraw command produced by the php script. The commands noted in these files can be copy & pasted to the command line of the Raspberry Pi to repeat the command manually.
When encountering problems please report them back to me (via the email address stated at the top of this page), please include screen shots of the ASCOM client window and corresponding logfile content of the failed image attempt so I can effectively investigate the issue. Please also include the name and version of the used astro software.
RPi_camera.php script (starting after this line, till the end of this instruction page), please note this software is copyrighted by ITCAP bv but can be used and altered freely as long as the source of the original code and the Author is properly mentioned:
<?php
$type = "jpg"; // Default type to create jpg files
$debug = false; // Default debug is switched off
$doit = true; // Default doit is switched on
$debug = isset($_REQUEST['debug']) ? validate_boolean($_REQUEST['debug']) : $debug; // Dump Unix commands on command line interface (for debugging purposes only)
$doit = isset($_REQUEST['doit']) ? validate_boolean($_REQUEST['doit']) : $doit; // Flag to prevent Unix command to be executed (for debugging purposes only)
$type = isset($_REQUEST['type']) ? validate_value($_REQUEST['type'], "jpg,png,gif,bmp") : $type; // Desired file type
$exposure = isset($_REQUEST['exposure']) ? validate_value(strtolower($_REQUEST['exposure']), "auto,night,nightpreview,raw,off,verylong,fireworks") : "off"; // Default off
$analog_gain = isset($_REQUEST['analog_gain']) ? validate_number($_REQUEST['analog_gain']) : 1; // Default 1
$flicker = isset($_REQUEST['flicker']) ? validate_value($_REQUEST['flicker'], "off,auto,50hz,60hz") : "off"; // Default flicker mode off
$awb = isset($_REQUEST['awb']) ? validate_value(strtolower($_REQUEST['awb']), "off,auto,sun,cloud,shade,tungsten,fluorescent,incandescent,flash,horizon,greyworld") : "auto"; // Default auto wide balance
$hflip = isset($_REQUEST['hflip']) ? validate_boolean($_REQUEST['hflip']) : false; // Default horizontab flip off
$vflip = isset($_REQUEST['vflip']) ? validate_boolean($_REQUEST['vflip']) : false; // Default vertical flip off
$roi_x = isset($_REQUEST['roi_x']) ? validate_number($_REQUEST['roi_x']) : -1; // Default disabled
$roi_y = isset($_REQUEST['roi_y']) ? validate_number($_REQUEST['roi_y']) : -1; // Default disabled
$roi_w = isset($_REQUEST['roi_w']) ? validate_number($_REQUEST['roi_w']) : -1; // Default disabled
$roi_h = isset($_REQUEST['roi_h']) ? validate_number($_REQUEST['roi_h']) : -1; // Default disabled
$shutter = isset($_REQUEST['shutter']) ? validate_number(round($_REQUEST['shutter'])) : 1000000; // Default 1 seconts
$drc = isset($_REQUEST['drc']) ? validate_value(strtolower($_REQUEST['drc']), "off,low,med,high") : "off"; // Default dynamic range control switched off
$binning = isset($_REQUEST['binning']) ? validate_value(round($_REQUEST['binning']), "1,2,3,4") : 1; // Default on maximum resolution (4056 xc 3040)
$annotate = isset($_REQUEST['annotate']) ? validate_number(round($_REQUEST['annotate'])) : 0; // Default 0 (no text)
$timeout = isset($_REQUEST['timeout']) ? validate_number(round($_REQUEST['timeout'])) : 100; // Default 0.1 sec timeout
$verbose = isset($_REQUEST['verbose']) ? validate_boolean($_REQUEST['verbose']) : false; // Default debug info default off
$convert = isset($_REQUEST['convert']) ? validate_boolean($_REQUEST['convert']) : false; // Default debug info default off
$directory = isset($_REQUEST['directory']) ? $_REQUEST['directory']) : "images/"; // Target directory (default current directory)
// Remove previously created image and log files create longer than x minute ago
echo exec("find ".$directory."*.bmp -mmin +5 -type f -exec rm {} \;"); // Remove bmp files after 5 minutes
echo exec("find ".$directory."*.jpg -mmin +5 -type f -exec rm {} \;"); // Remove jpg files after 5 minutes
echo exec("find ".$directory."*.gif -mmin +5 -type f -exec rm {} \;"); // Remove gif files after 5 minutes
echo exec("find ".$directory."*.png -mmin +5 -type f -exec rm {} \;"); // Remove png files after 5 minutes
echo exec("find ".$directory."*.fits -mmin +5 -type f -exec rm {} \;"); // Remove fits files after 5 minutes
echo exec("find ".$directory."*.log -mmin +15 -type f -exec rm {} \;"); // Remove log files after 15 minutes
echo exec("find ".$directory."*.*~ mmin +2 -type f -exec rm {} \;"); // Remove temporary image files after 2 minutes
// Set shutter speed
// Limit shutter speed to minimal 0.000001 seconds
if ($shutter < 1)
$shutter = 1; // Lower limit is 0.000001 seconds
// Limit shutter speed to 239 seconds
if ($shutter > 239000000)
$shutter = 239000000; // Upper limit is 239 seconds
// Ensure binning is at least set to 1
if ($binning < 1)
$binning = 1; // Lower limit to 1
// Ensure binning is at most set to 4
if ($binning > 4)
$binning = 4; // Upper limit to 4
if (substr($directory,-1,1)!='/'))
$directory += "/";
// Create filename from selected ISO gain, exposure time and date/time stamp
$org_filename = "image_".$shutter."_".$binning."x".$binning."_".date("Ymd")."T".date("His");
$filename = $directory.$org_filename;
// Open log file for writing (create the file when needed)
$f = fopen ($filename.".log", "w+");
// Open en write selected details from the URL to the log file
$q = 0;
$qo = -1;
// Retrieve URL from character position 16 onwards
$p = substr($_SERVER['REQUEST_URI'], 16);
// Cycle through all give parameters (separated by & character)
while ($q = strpos($p, "&", $q + 1)) {
// Write parameter and the passed value, replace equal character (=) with a colon (:)
fwrite($f, str_replace("=", ": ", substr($p, $qo + 1, ($q - $qo - 1)))."\n");
// Save position of the & found in the string
$qo = $q;
}
if ($exposure!="raw") {
// Sensor width in pixels
$sensor_width = 4056;
// Sensor height in pixels
$sensor_height = 3040;
// Check lower value for analog gain (=> 1)
if ($analog_gain < 1)
$analog_gain = 1;
// Check upper value for analog gain (<= 16)
if ($analog_gain > 16)
$analog_gain = 16;
// Call raspistill and ensures nopreview option is selected, flicker control is switched off and auto white balance is switched off
$command = "/usr/bin/raspistill --nopreview --metering average --thumb none ";
// Add file type (jpg, png or bmp) to the command string
// Check for jpg value
if ($type=="jpg")
// Set jpg file in the raspistill command string
$command .= "--raw --quality 100 --output ".$filename.".jpg ";
// Other file formats (bmp, gif and png)
else
// Add bmp, gif or png file type encoding tot he raspistill command string
$command .= "--encoding ".$type." --output ".$filename.".".$type." --burst ";
// Add header labels to the command string
$command .= "--exif 'INSTRUME=Raspberry Pi Camera V3' --exif 'DATE-LOC=".date("Y-m-d")."T".date("H:i:s")."' --exif 'IMAGETYP=LIGHT' --exif 'EXPOSURE=".($shutter / 1000000)."' --exif 'HFLIPPED=".$hflip."' --exif 'VFLIPPED=".$vflip."' --exif 'GAIN=".$iso."' --exif 'FILTER=RGB' ";
// Set ISO value
//$command .= "--ISO ".$iso." ";
// Set exposure type
$command .= "--exposure ".$exposure." ";
//$command .= "--exposure off ";
// Set flicker mode
$command .= "--flicker ".$flicker." ";
// Set auto white balance
if ($awb!='off')
$command .= "--awb ".$awb." ";
else
// Set manual white balance (R = R * 3.3, B = B * 1.53
$command .= "--awb off --awbgains 2,1.53 ";
// Horizontal flip
if ($hflip)
$command .= "--hflip ";
// Vertical flip
if ($vflip)
$command .= "--vflip ";
// Set region of interest
if ($roi_x!=-1 and $roi_y!=-1 and $roi_w!=-1 and $roi_h!=-1) {
// Determine new width
$w = round($roi_w / $sensor_width * 100) / 100;
// Ensure width is between 0 and 1 (0 and 100% of the sensor width)
if ($w < 0 or $w > 1)
$w = 1;
// Determine new height
$h = round($roi_h / $sensor_height * 100) / 100;
// Ensure height is between 0 and 1 (0 and 100% of the sensor height )
if ($h < 0 or $h > 1)
$h = 1;
// Add region of interest to the command string
$command .= "--roi ".$x.",".$y.",".$w.",".$h." ";
}
// Add shutter speed to raspistill command string
// for higher then 5 seconds exposures use the extra -lss option to prevent long waiting times
$command .= "--shutter ".$shutter." ";
// Set dynamic range control
$command .= "--drc ".$drc." ";
// Set analog gain
// Ensure analog gain is at least set to 1
// Add analog gain setting to command string
$command .= "--analoggain ".$analog_gain." ";
// Set camera mode (resolution)
// Translate the desired binning size to the right camera mode
// Check if binning 1 is selected
if ($binning==1)
// Select binning 1 (4060 x 3056 pixels)
$roi = "";
// Check if binning 2 is selected
elseif ($binning==2)
// Select binning 2 (2028 x 1520 pixels)
$roi = "--roi 0.25,0.25,0.5,0.5 ";
// Check if binning 3 is selected
elseif ($binning==3)
// Select binning 3 (1352 x 1013 pixels)
$roi = "--roi 0.333333,0.333333,0.333333,0.333333 ";
// Binning 3 is selected
else
// Select binning 4 (1014 x 764 pixels)
$roi = "--roi 0.375,0.375,0.25,0.25 ";
// Add required camera mode (for the desired binning factor) to the raspistill command string
$command .= "--mode 3 ";
$command .= $roi;
// Set annotation text
if ($annotate)
$command .= "--annotate ".$annotate." -ae 32,0xff,0x808000 "; // Default to size 32 white text on black background
$timeout = round($shutter / 20000);
// Ensure timeout is at least set to 0.1 sec
if ($timeout < 100)
$timeout = 100; // Lower limit to 0.1 seconds (unfortunately 0 secs causes raspistill to crash)
// Ensure timeout is at most set to 15 sec
if ($timeout > 15000)
$timeout = 15000; // Upper limit to 15 seconds
// Add timeout value to the raspistill command prompt
$command .= "--timeout ".$timeout." ";
// Set debug info
if ($verbose)
$command .= "--verbose ";
// Set remaining changeable options
$command .= "--digitalgain 1 --stats --burst ";
// Write raspistill command string to the log file
fwrite($f, "\n".$command."\n\n");
// Close the log file
fclose ($f);
// Show command on the command interface when debug parameter is true or not 0
if ($debug)
echo " MESSAGE: executing command: ".$command."<br>\n";
// Check if Unix command should be executed
if ($doit)
// Execute raspistill command
exec($command);
}
// Use raspiraw
else {
// File extension is always png
$type = "png";
// Call long exposure and raw2ogg2anim script
$command = "export PATH=/var/www/html/dcraw:/var/www/html/raspiraw:/var/www/html/raspiraw/tools:/bin:/usr/bin:/usr/sbin;cd ".$directory."; /var/www/html/raspiraw/camera_i2c;/var/www/html/raspiraw/tools/long_exposure ".$shutter.";/var/www/html/raspiraw/tools/raw2ogg2anim dummy 1 1 1;mv out.0001.ppm.d.png ".$filename.".png;";
// Write raspistill command string to the log file
fwrite($f, "\n".$command."\n\n");
// Close the log file
fclose ($f);
// Show command on the command interface when debug parameter is true or not 0
if ($debug)
echo " MESSAGE: executing command: ".$command."<br>\n";
// Check if Unix command should be executed
if ($doit)
// Execute change permission command
exec($command);
}
// Change permissions on the file
$ecommand = "chmod 660 ".$filename.".".$type;
// Show command on the command interface when debug parameter is true or not 0
if ($debug)
echo " MESSAGE: executing command: ".$ecommand."<br>\n";
// Check if Unix command should be executed
if ($doit)
// Execute change permission command
exec($ecommand);
// Check if image needs to vbe converted to fits
if ($convert) {
// Convert using imagemagick convert function
$ecommand = "convert ".$filename.".".$type." ".$filename.".fits";
// Show command on the command interface when debug parameter is true or not 0
if ($debug)
echo " MESSAGE: executing command: ".$ecommand."<br>\n";
// Check if Unix command should be executed
if ($doit)
// Execute convert to fits command
echo exec($ecommand);
// Change permissions on fits file
$ecommand = "chmod 660 ".$filename.".fits";
// Show command on the command interface when debug parameter is true or not 0
if ($debug)
echo " MESSAGE: executing command: ".$ecommand."<br>\n";
// Check if Unix command should be executed
if ($doit)
// Execute change permission command
echo exec($ecommand);
}
// Show file name on the command interface when debug parameter is not false or 0
if (!$debug)
echo $org_filename.".".$type."<br/>\n".$command;
// Otherwise show image on the screen
else
echo "<img src='".$filename.".".$type."' width='676' height='506' />\n".$command."<br/>\n";
// Function to validate input variable $v (it should consist of y, n, Y, N , 0, 1, true or false)
function validate_boolean($v) {
// Chop of spaces at the start and end of the string
$v = trim($v);
// Check for permitted input values
if (!$v or $v=="0" or $v=="1" or strtolower($v)=="true" or strtolower($v)=="false" or strtoupper($v)=="N" or strtoupper($v)=="Y")
// Check if value false
if (!$v or strtolower($v)=="false")
// Return false value
return false;
else
// Return true value
return true;
else
// Return false value
return false;
}
// Check if input variable $v consists of numbers or a point (.) or a minus (-) sign
function validate_number($v) {
// Set error flag
$err = false;
// Chop of spaces at the start and end of the string
$v = trim($v);
// Check if input variable is 0
if ($v=="0")
// Return the variable value;
return $v;
// Cycle through all the entered characters
for ($i = 0; $i < strlen($v); $i++)
// Check for permitted input values
if (!($v[$i]== "-" and $i==0) and ($v[$i] < "0" or $v[$i] > "9") and $v[$i]!=".")
// Flag the input variable as not compliant
$err = true;
// Check if input variable was valid
if ($err)
// Return 0 value
return 0;
// Input variable was valid
else
// Return checked value
return $v;
}
// Check if input variable $v consists of the possible values passed in the value parameter
function validate_value($v, $options) {
// Set error flag
$err = false;
// Chop of spaces at the start and end of the string
$v = trim($v);
// Determine position in possible value string to start searching
$p = $q = -1;
// Reset value string position counter
$to = 0;
// Cycle through possible options string (delimited by comma's), a maximum 50 options is allowed
while ($p = strpos($options, ",", $p + 1) and $to < 50) {
// Retrieve possible option and trim of trailing and leading spaces
$t = trim(substr($options, $q + 1, $p - $q - 1));
// Save the position where "," was found
$q = $p;
// Increase option counter
$to++;
// Check if input variable is one of the found allowed options
if ($t==$v)
// Return the input variable
return $v;
}
// Get last possible allowed option
$l = trim(substr($options, $q + 1));
// Check if input variable is one of the found allowed options
if ($l==$v)
// Return the input variable
return $v;
// Option similar to the input variable could not be found in the allowed options variable $options
else
// Illegal option found
$err = true;
// Check if an illegal variable was given
if ($v and $err)
// Return false
return false;
// Legal option was given
else
// Return the allowed variable value
return $v;
}
?>